In a nutshell
- ✨ Why it works: The acetic acid in white vinegar dissolves alkaline films (limescale, soap scum, grease), restoring the glaze so tiles look whiter and brighter; best on ceramic and porcelain.
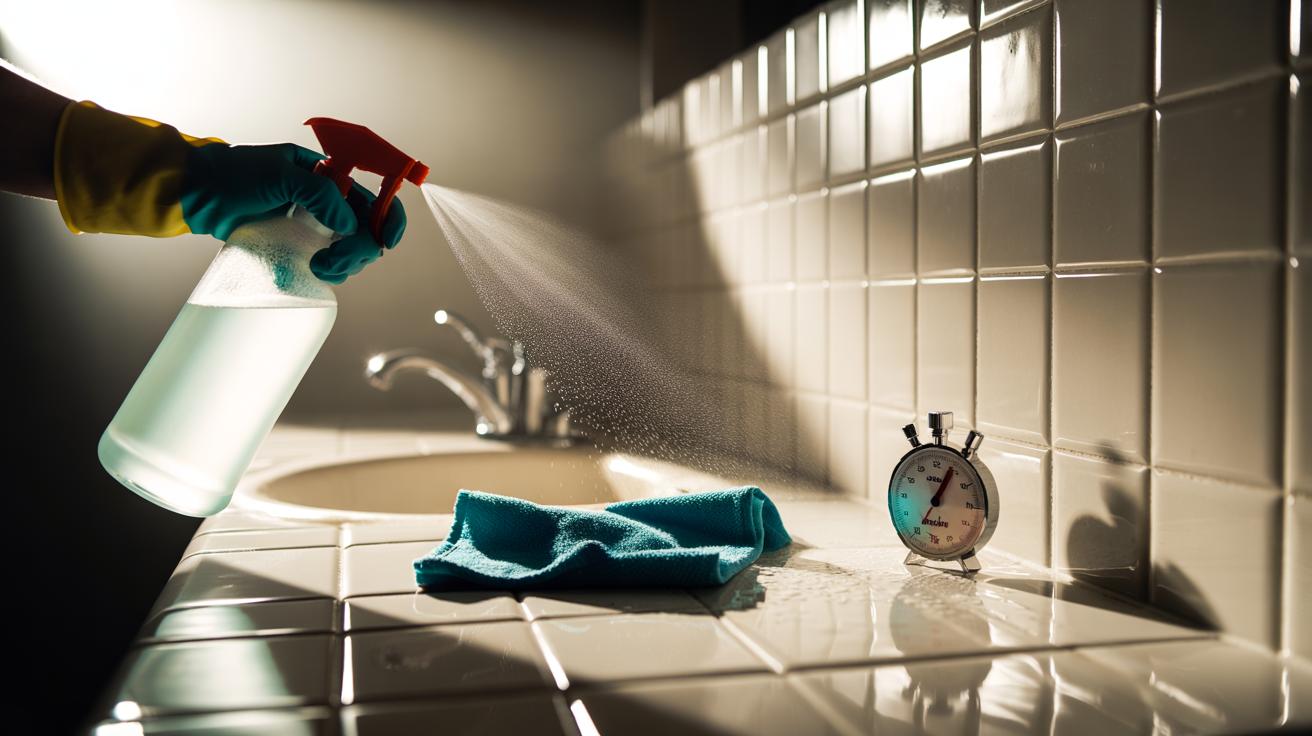
- ⏱️ 2-minute method: Sweep, spray a 1:1 warm water–white vinegar mix, dwell 60–90s, wipe in S‑shapes, then buff with a microfibre cloth; add a drop of washing‑up liquid for greasy spots.
- 📊 Dilutions at a glance: 1:1 for ceramic/porcelain film, 2:1 for glass tiles with soap scum, 1:2 for vinyl; spot‑treat grout briefly and rinse; never use on natural stone.
- ⚠️ Safety first: Do not use on marble, limestone, cement tiles, or unsealed grout; ventilate, wear gloves if sensitive, and never mix vinegar with bleach due to toxic gas risk.
- 💡 Pro tips: Finish with a dry microfibre or squeegee for a streak‑free sheen; for corners, sprinkle bicarbonate of soda then spritz vinegar; regular light mists keep buildup at bay and cost pennies.
White vinegar has a reputation that borders on mythical. Cheap, unfussy, and remarkably effective, it cuts through the grime that dulls kitchen and bathroom tiles without the harshness of industrial chemicals. In busy homes, time matters. That’s why a quick, two‑minute refresh can feel like a small miracle. Spray, wait, wipe, shine. The secret lies in the gentle acidity of acetic acid, which dissolves mineral haze, soap film, and sticky residues. Used correctly, it’s safe for most glazed surfaces and grout, and it leaves a clean, neutral smell once it dries. Two minutes won’t fix years of neglect, but it will restore clarity and gloss fast, and for pennies.
Why Vinegar Works on Dingy Tiles
The chemistry is simple. Acetic acid in white vinegar (typically around 5%) lowers pH and loosens alkaline residues such as limescale, cement dust, and soap scum. These deposits scatter light across a tile’s surface, making it look grey and tired. By dissolving that film, vinegar lets the original glaze reflect light again. That’s why tiles look whiter and brighter after a brief dwell. It also disrupts everyday kitchen greases and eliminates stale odours that cling to splashbacks and floors.
There’s nuance. Ceramic and porcelain tiles are generally safe; their glazes are acid‑resistant. Vinyl tends to tolerate diluted vinegar well. But avoid natural stone like marble, limestone, and travertine; acids etch calcite and can permanently dull the finish. The same caution applies to cement tiles and unsealed grout. Vinegar is not a hospital disinfectant. It does reduce some microbes, but rely on proper sanitisers when needed. For routine sparkle, though, vinegar wins on speed, cost, and simplicity. Pair with warm water and a microfibre cloth to lift the loosened film in a single pass.
The 2-Minute Shine Method
Ready, steady, spray. Start by removing loose grit with a quick sweep or a dry microfibre wipe. Mix 1:1 warm water and white vinegar in a spray bottle. Warmth accelerates the breakup of residues, but don’t make it hot enough to steam. Lightly mist the tile surface from 20–30 cm away until evenly damp, not dripping. Leave it to dwell for about 60–90 seconds. That pause is doing the heavy lifting—acid meeting alkaline, film loosening on its own.
Now agitate. Use a soft pad or cloth to wipe in overlapping S‑shapes. Add a pea‑sized drop of washing‑up liquid on the cloth if grease is obvious; it boosts surfactancy without foaming wildly. Rinse or wring with clean water, then buff dry with a fresh microfibre. For floors, a flat microfibre mop works beautifully. In ordinary conditions, the entire sequence takes about two minutes per square metre and leaves a bright, streak‑free finish. If grout looks shadowed, dab a little solution directly on lines and scrub with a soft brush for 20–30 seconds, then rinse. Still safe, still quick.
Ratios, Surfaces, and Timing at a Glance
Different tiles, different films, different dwell times. Use this simple guide to choose your dilution and contact time. When in doubt, start milder and increase strength only if needed. Always test in a discreet corner first.
| Surface/Soil | Vinegar Ratio | Dwell Time | Notes |
|---|---|---|---|
| Ceramic/Porcelain tiles (light film) | 1:1 vinegar:water | 1–2 minutes | Wipe, then buff dry for sheen. |
| Glass shower tiles (soap scum) | 2:1 vinegar:water | 2–3 minutes | Rinse well to prevent streaks. |
| Grout lines (light haze) | 1:1 vinegar:water | 2–5 minutes | Use a soft brush; avoid unsealed cement. |
| Vinyl tiles (grease) | 1:2 vinegar:water | 1–2 minutes | Check manufacturer guidance; no soaking. |
| Natural stone of any kind | Do not use | — | Acid can etch and dull the surface. |
Water hardness matters. Heavily mineralised water leaves faster haze; a slightly stronger mix or a second quick pass can fix it. Never mix vinegar with bleach or products containing chlorine—this releases toxic gas. If the scent puts you off, add a drop of lemon essential oil to the bottle; it won’t affect performance. For stubborn corner build‑up, dust on a pinch of bicarbonate of soda, spritz vinegar, let it fizz for 30 seconds, and wipe—gentle abrasion without scratches.
Safety, Pitfalls, and Pro Tricks
Think smart, clean fast. Ventilate well and wear light gloves if your skin is sensitive—acids can be drying. Do not use on marble, limestone, concrete, cement tiles, or any unsealed porous surface. Keep vinegar away from iron hardware and natural rubber seals; wipe spills promptly to prevent corrosion or swelling. If grout is newly sealed, wait the manufacturer’s recommended cure time before any acidic product. And always label your spray bottle clearly.
For streak‑free brilliance, finish with a quick buff using a dry microfibre or window squeegee on wall tiles. Targeted maintenance keeps the “two‑minute” claim honest: a 30‑second mist after steamy showers or splashy cooking stops films from setting hard. Economically, the case is strong—per‑use costs are pennies, and there’s no cocktail of synthetic fragrances or dyes to irritate. The result is a whiter, crisper tile field that looks freshly installed, without the elbow grease you’d expect. If you outpace the odour, leave the room open for five minutes; the smell vanishes as it dries.
Vinegar’s charm is its simplicity. With one bottle and a cloth, you can lift haze, flatten odours, and restore the bright gloss most tiles are designed to show. The key is contact time, not force. Mist lightly, let chemistry work, wipe once, and enjoy the reveal. Used regularly, this two‑minute ritual will keep kitchens and bathrooms camera‑ready with minimal effort. Ready to try it today, or will you tweak the ratios to suit your water, your tiles, and your timetable?
Did you like it?4.5/5 (26)